My two passions are art and gardening, so painting a block wall in my garden to create the illusion of a brick wall ticks both boxes and is keeping me busy this summer. This is my tutorial.
BACKGROUND
The view of our beautiful Victorian coachhouse at the back of the garden is obscured by a breeze/cinder block wall, which wraps around the whole length of the garden. The wall is strong and functional, but it’s certainly no looker. I’d already painted it a brick red colour which was arguably a little better than grey, but only just.
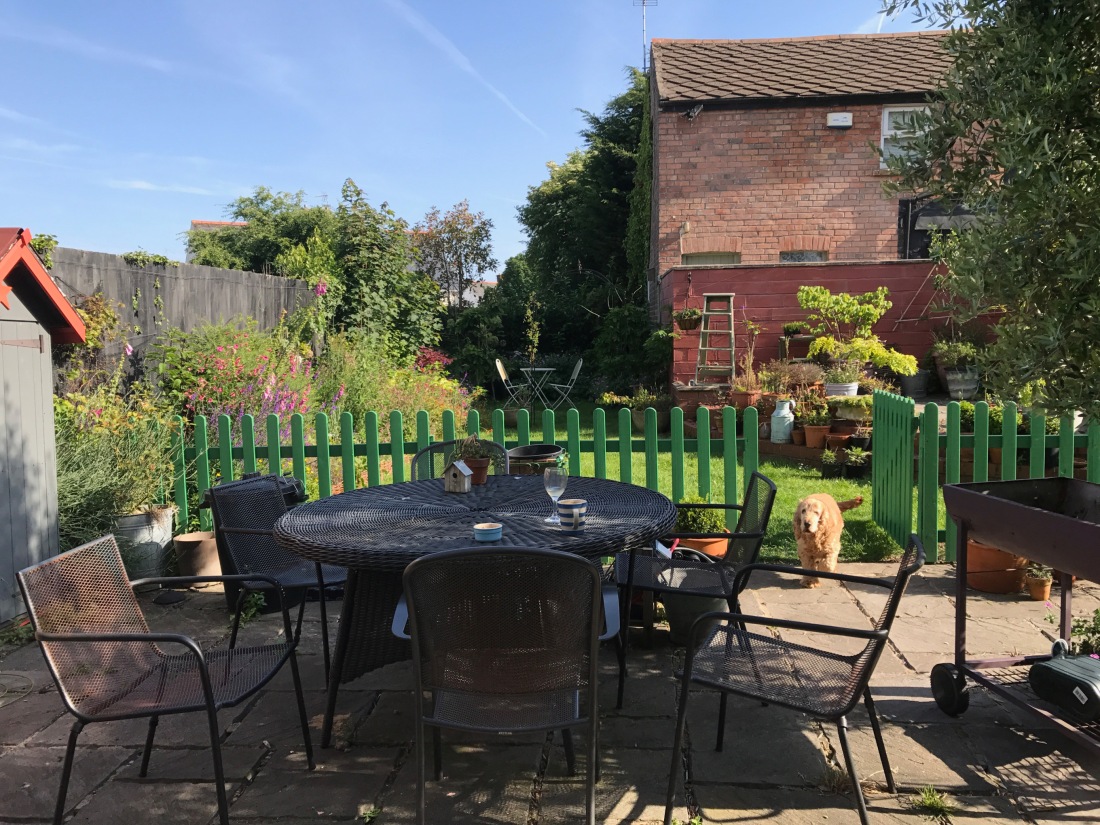
I wanted the wall to blend in better with the coachhouse so I decided to try and create a brick effect with some Trompe l’oeil.
Trompe l’oeil is French for “to deceive the eye” is an art historical tradition in which the artist creates an optical illusion that makes the you believe that a two dimensional object exist in three dimensions. It was used in Renaissance art, and is still used on the stage and in interior design, etc.
Since the wall was painted already, I had nothing to lose. If if it went wrong – I could just paint over it.
CREATING MY ILLUSION
I’ve worked out a method, by trial and error, and wanted to share my step by step guide so others can create a similar effect. I started this late morning with the sun full on the wall and ended in shade, so excuse the variation in light etc.
Since my breeze block wall had already been painted, I was starting off with a suitable undercoat, and you’ll need one too. Painting breeze block takes a lot of masonry paint because it’s porous.
DISCLAIMER
I’m handy with a paint brush, but if you’re confident, can match up a colour and have some basic skills with a brush and paint, I think you’ll be able to achieve this and have fun with it. However, the best thing about painted walls is you can always repaint over the whole thing if you don’t like what you’ve done.
THE PAINT
Do not use emulsion, use proper masonry paint. Tester pots in masonry paint are available cheaply in B&Q and elsewhere in all colours, and they go a long way.
Try and pick a colour that hits the mid range, then build up texture and realism in the warmer and cooler registers. Getting the colour cards in the right general shades from B&Q’s huge range of paints means you can hold them up against the existing brick you’re matching, and just put a cross on the ones that match on the card and buy testers in the corresponding colours, at least three different colours, with a white and black too. Be prepared to mix them up to create mid shades.
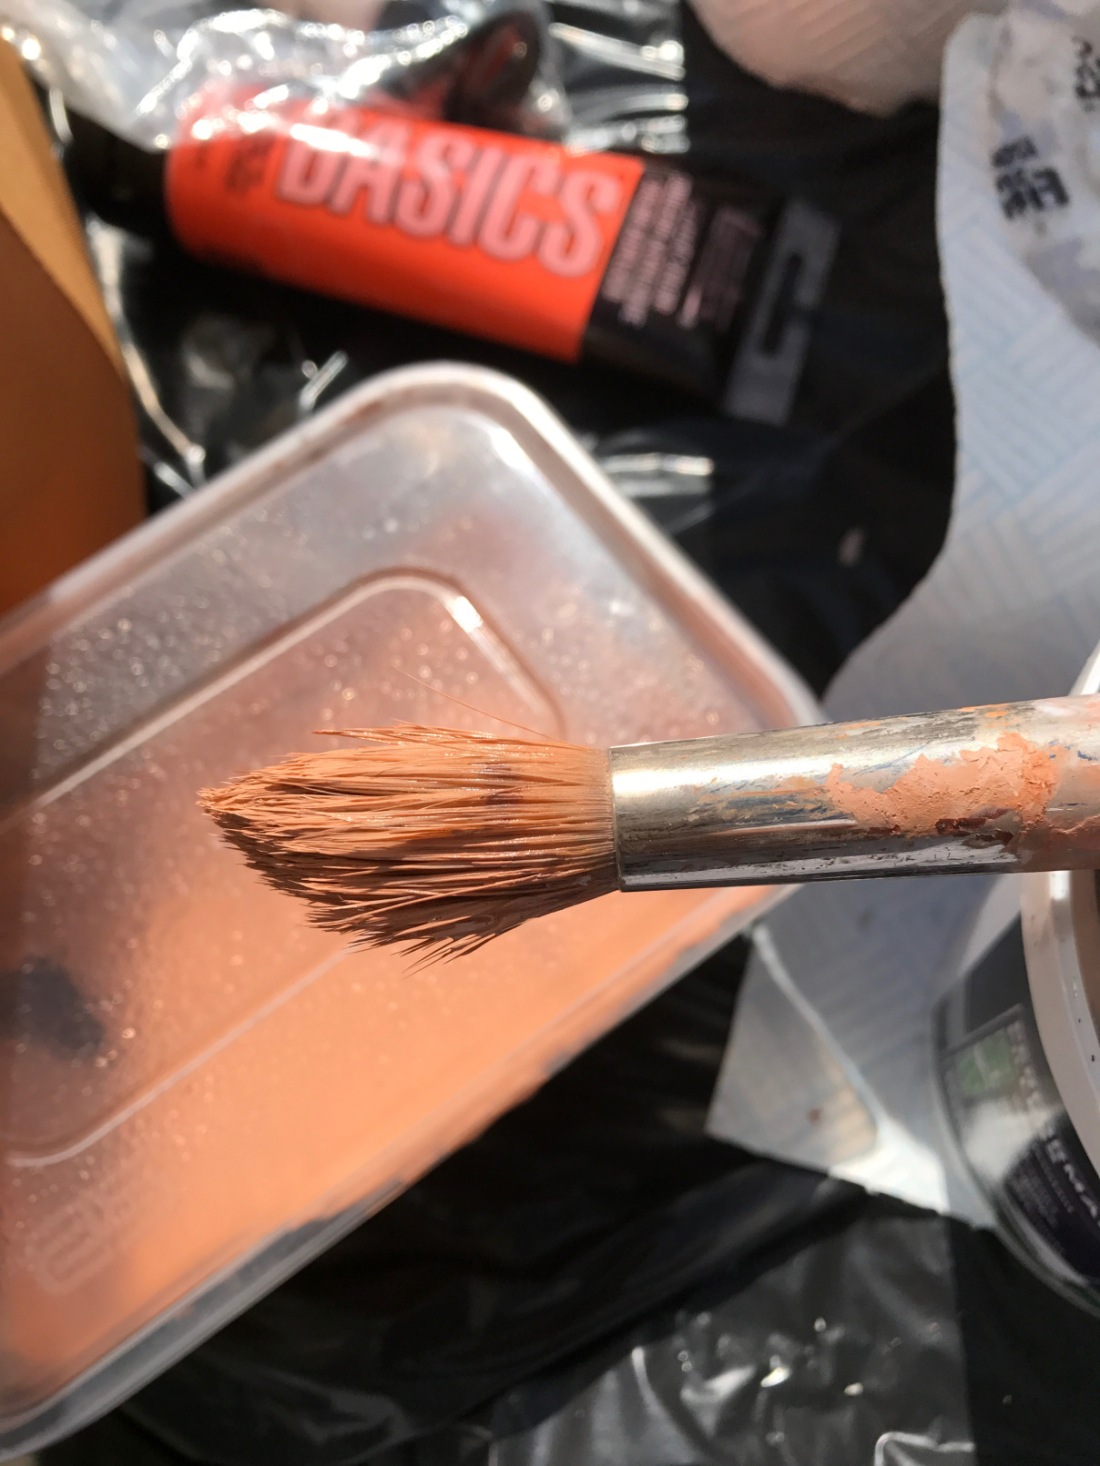
BRUSHES
Any good bristle brushes will do, hog hair is best. If you buy cheap you’ll be picking hairs out of the wall, so buy what you can afford and put them in water in between using. I bought cheap plastic boxes to mix my paints in. You can put the lid over it to preserve them in between brushes.
STARTING OFF
If possible, start on a part of the wall that’s tucked away while you practise your technique. Try not to work in direct sunlight. There will be a point when you think you’ve completely cocked it up, or wonder why the hell you started. Ignore those doubts and keep going. It’ll come good.
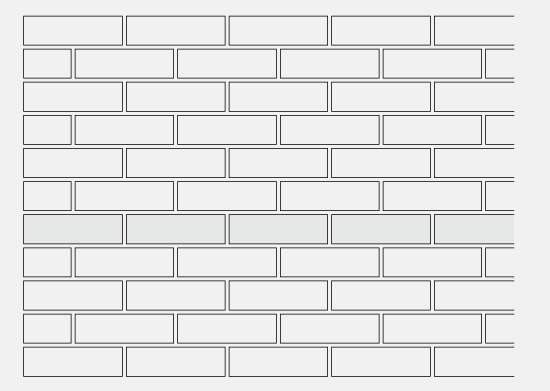
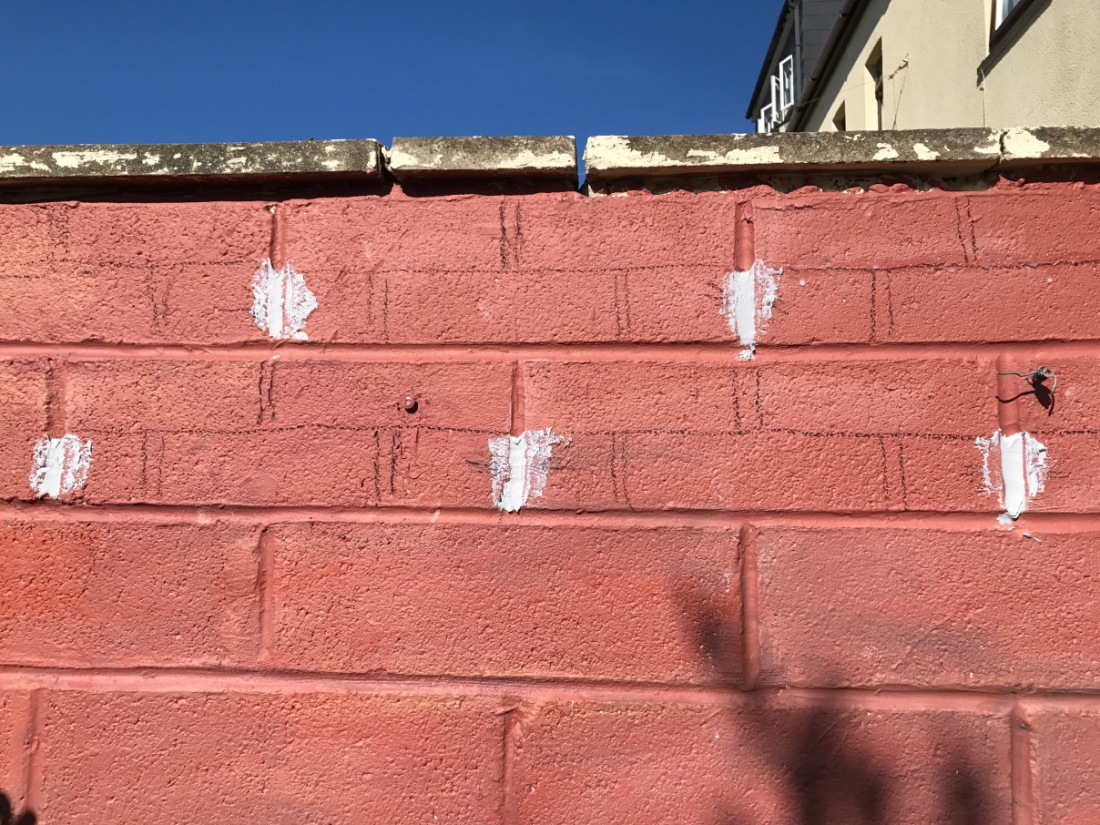
First thing I did was to get some charcoal and draw out the shape of the bricks on to the wall. You could use chalk if your base colour was darker.
I drew mine by hand because I’m confident and I’m trying to recreate hand made bricks so don’t want them to look regimental. You may feel more comfortable with a ruler but don’t be too fussy or they’ll look fake. And please, for the love of God and all that is holy, don’t even think of using a brick stencil or it’ll look like wallpaper.
Breeze blocks are usually designed to sit behind bricks, so the size works out great for this project. Each breeze block is two bricks high and two bricks wide. Use a loose brick to hold up and measure.
If your breeze blocks are not a good match to bricks, consider whether to continue because your job just got 10 times harder.
The most common way to lay bricks is called the’ running bond’. It is composed of stretchers offset by 1/2 brick per course. It’s a straightforward pattern once you get your head around it, and easy to replicate on breeze block.
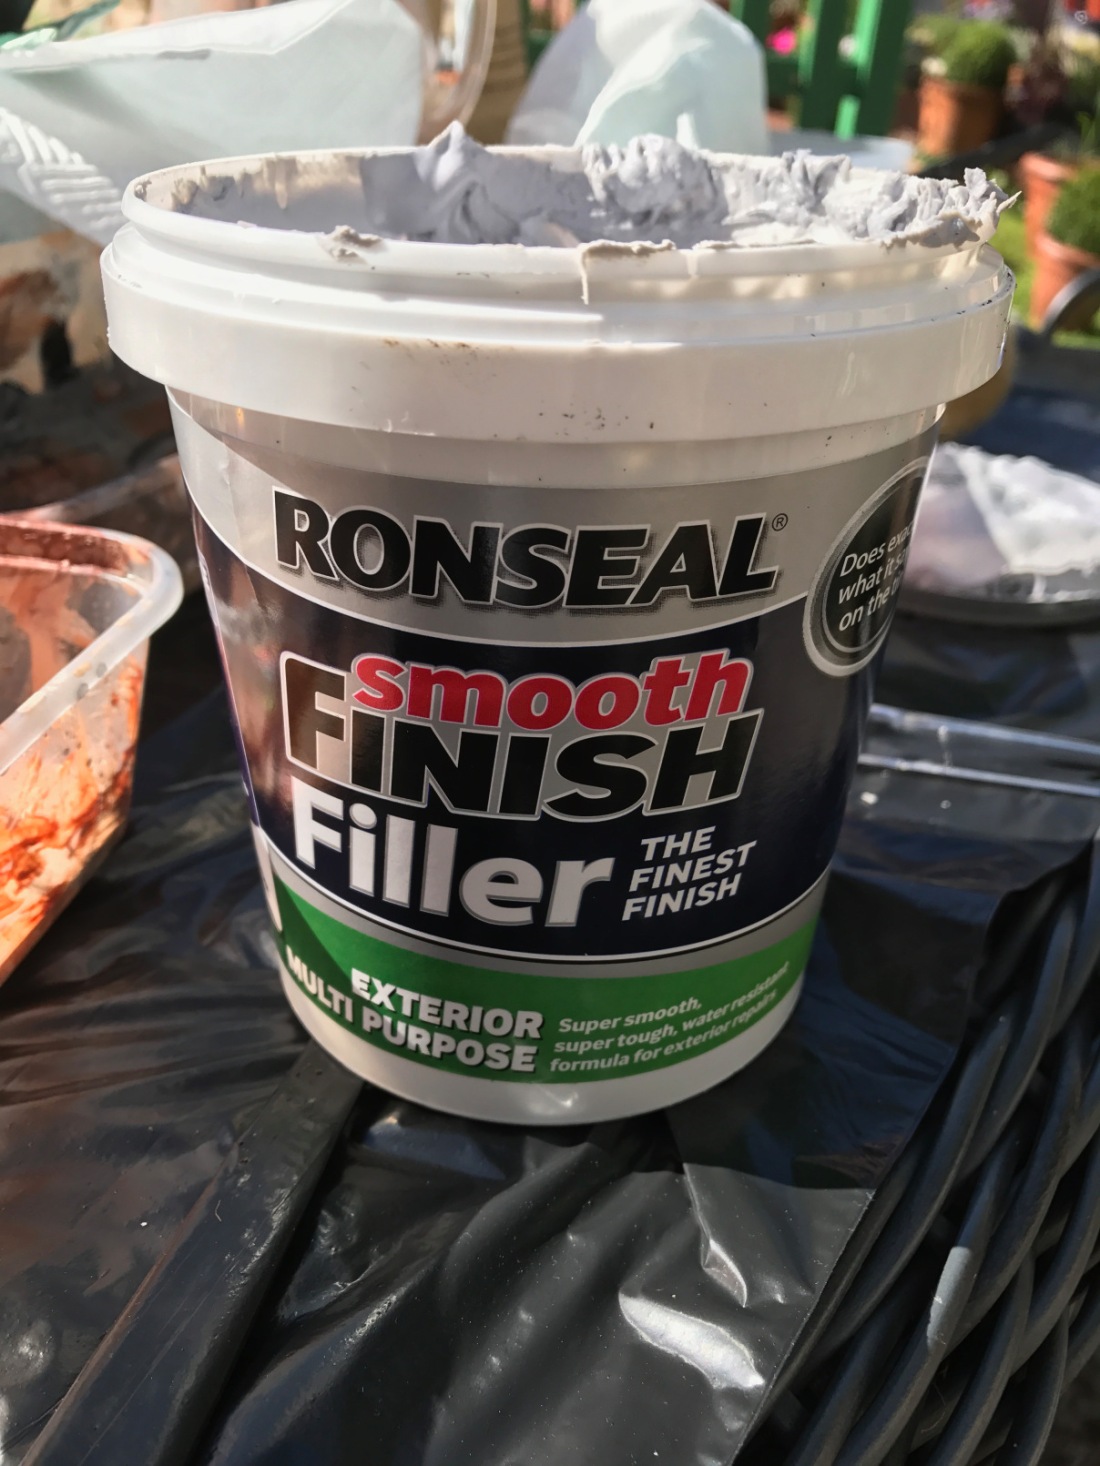
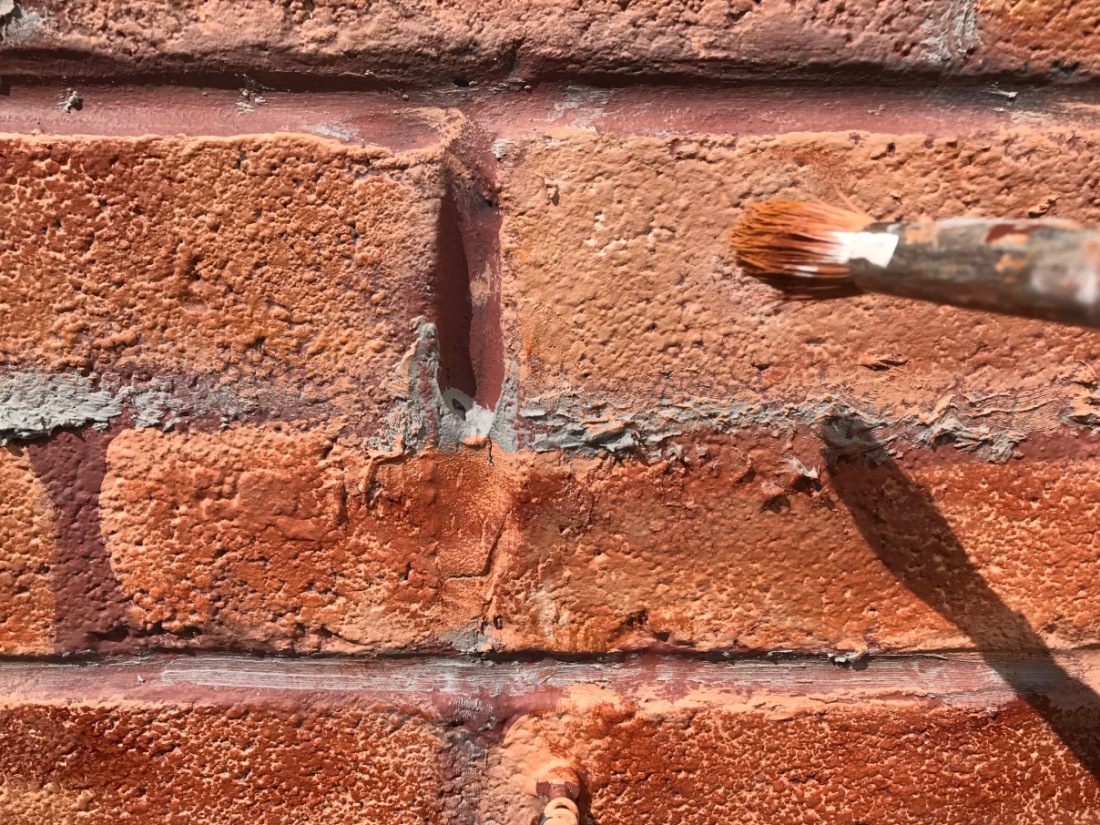
For the distant bricks set back in the garden, I didn’t use any filler, but when you are facing the ‘bricks’ at close range, a filler tricks the eye better. I used this stuff which worked fine as a filler, but it’s soon to say how it will weather long term.
The top row works out well with the spaces between the breeze blocks corresponding with the bricks. But when you go down the next row it’s a matter of filling in a gap so it lays flatter and helps you create the illusion of a brick. You may want to be fussier than me about the finish but I’m pretty laid back.
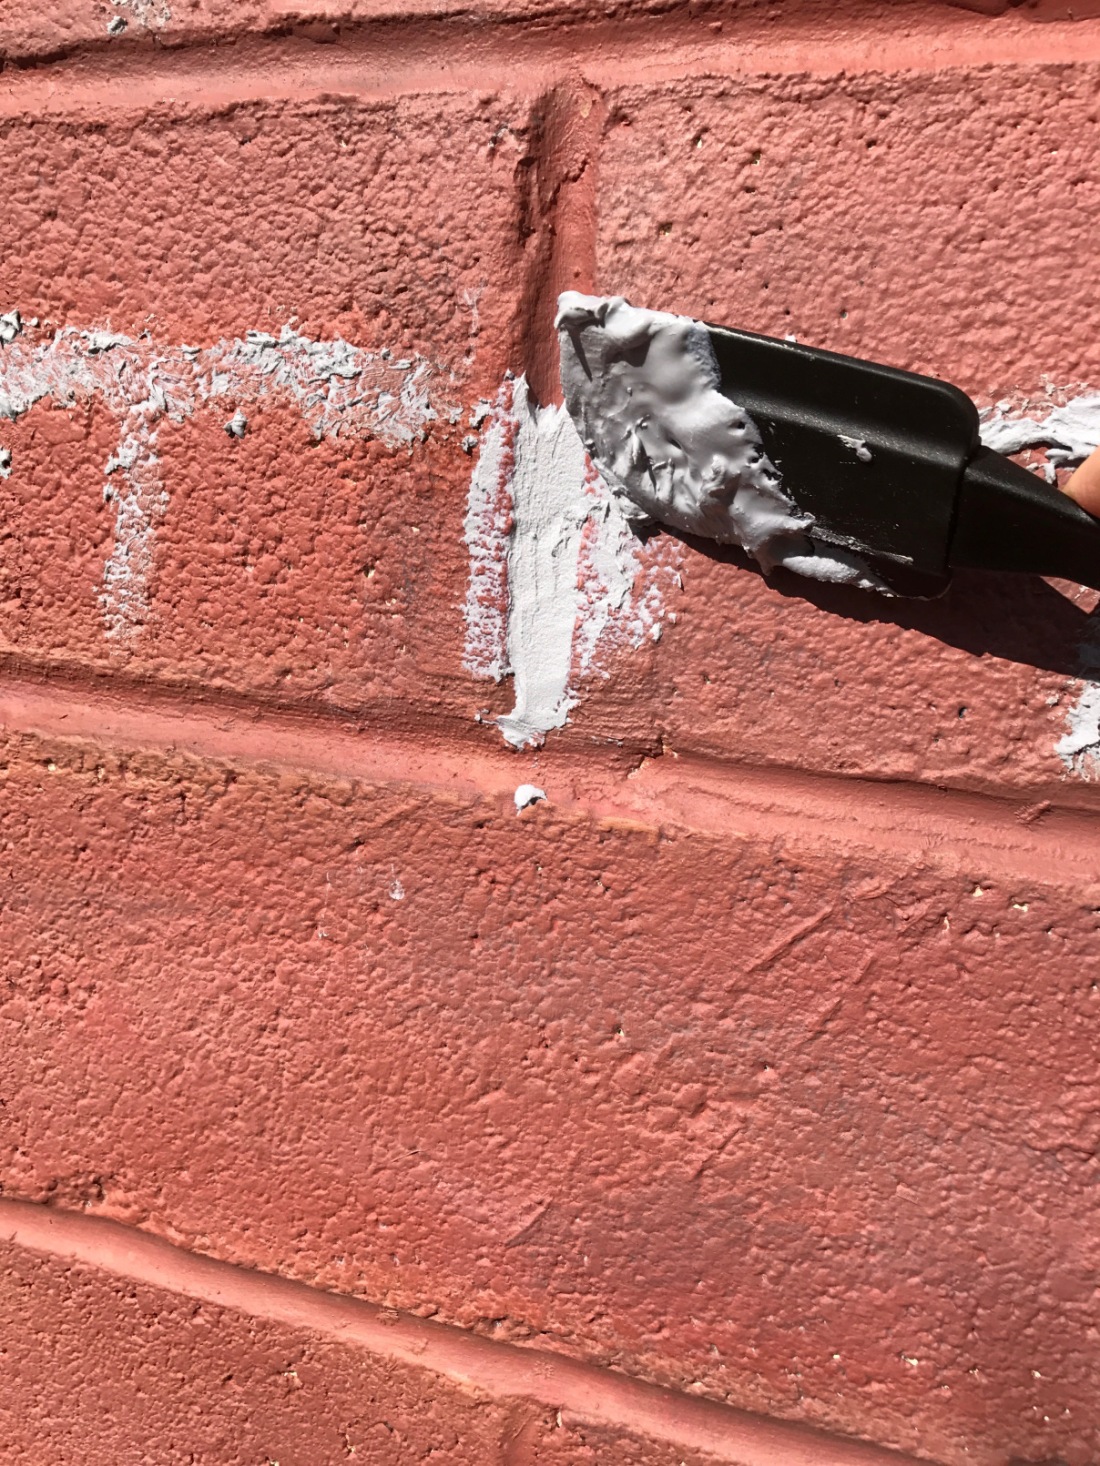
Next thing I did with an old toothbrush is take some of the filler and create a kind of rough mortar effect to suggest the shape of the bricks. This has all been mapped out with the charcoal so it’s easy.
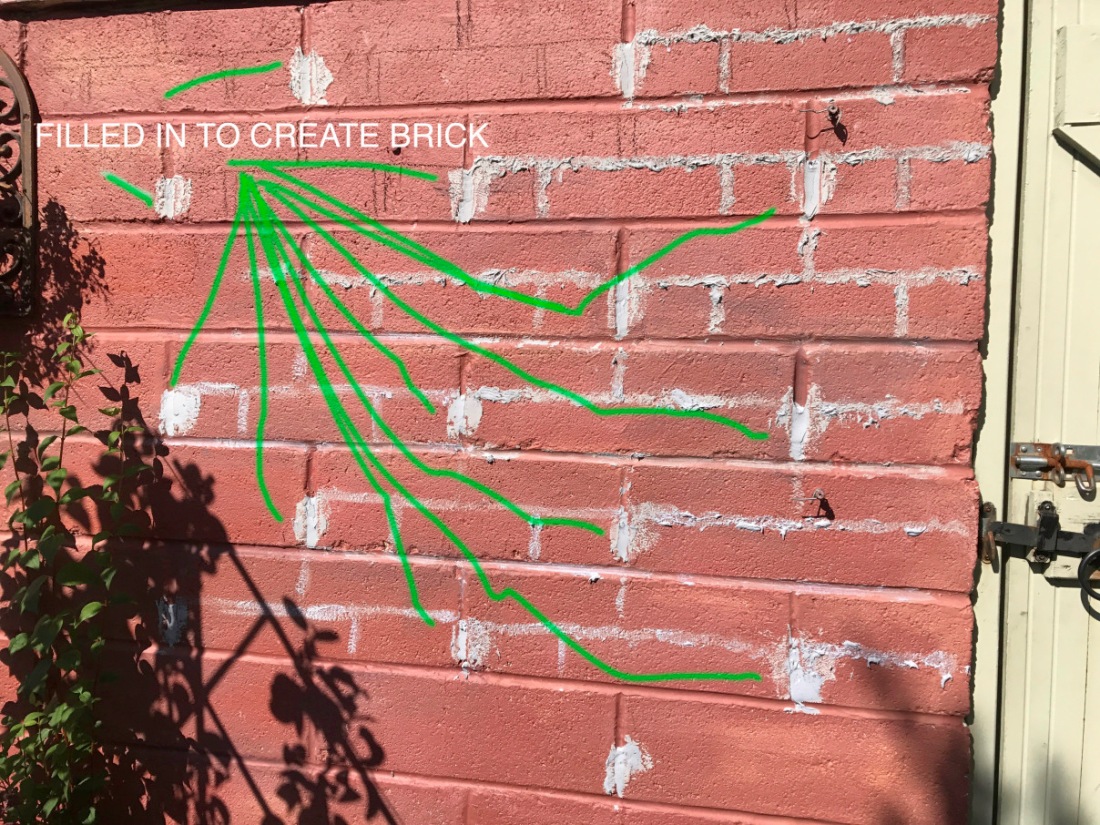

Next I painted in my flat coat in the approximate base colour of the wall. I used B&Q masonry tester pots here, and one goes a long way.
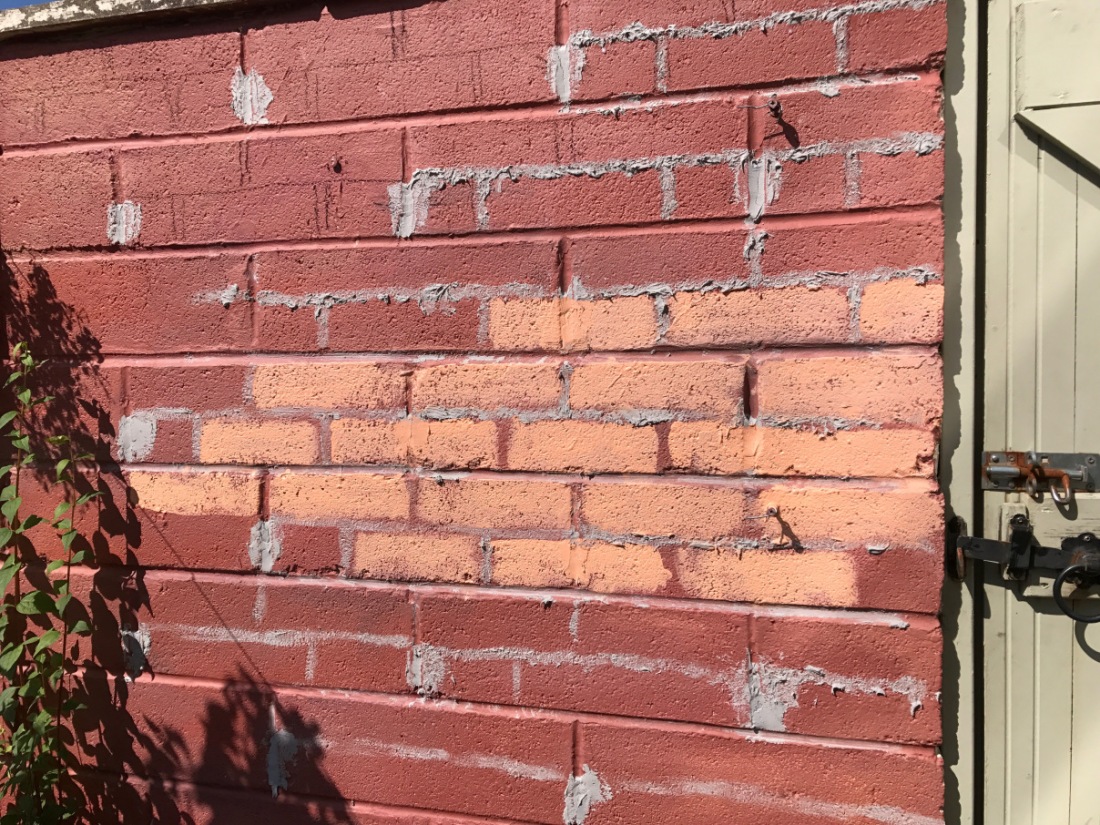
Next I start to add a little acrylic or you could you your next colour mixed in. There is no prescription for the colours, you have to blend and match them how you want for your own project. I used rough hog hair brush and applied it in dryish layers .
You can see how scary these colours look – I went too bright. Don’t panic you can keep adjusting until you’re happy. Use a dry brush and scumble over the top so that the colour underneath shows though but the effect is dulled.
Next I started to add a grey to suggest the mortar, again this is something to play with. You’ll keep adding and subtracting until it looks right – there are some excellent photos online of all types of brick wall if you don’t a wall to copy on your premises.
Ooops. You can see below where I didn’t fill the gap between breeze blocks properly. At a distance that wouldn’t matter but close up it needs to be filled properly or it’ll cast a shadow and give the game away.
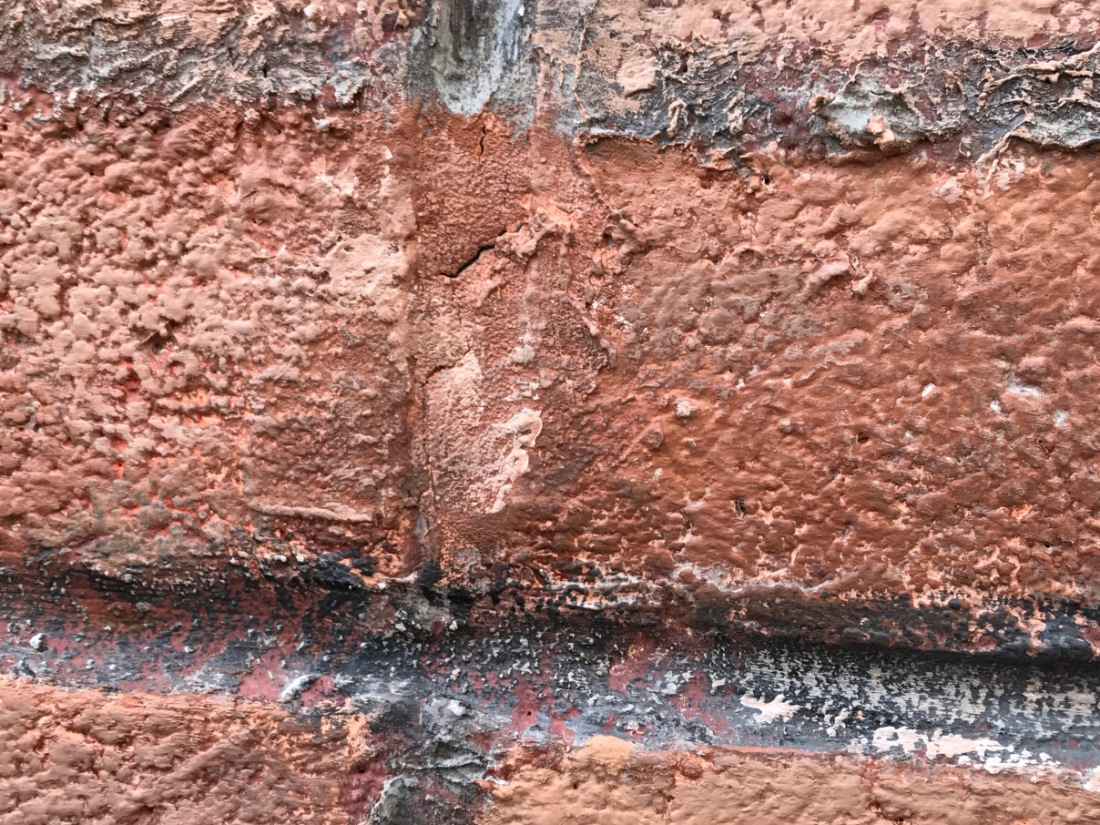
You can see it’s starting to come together a bit now. The colours are not correct or blended well enough but your brain is already seeing bricks because the layout, approximate shade and size is correct.
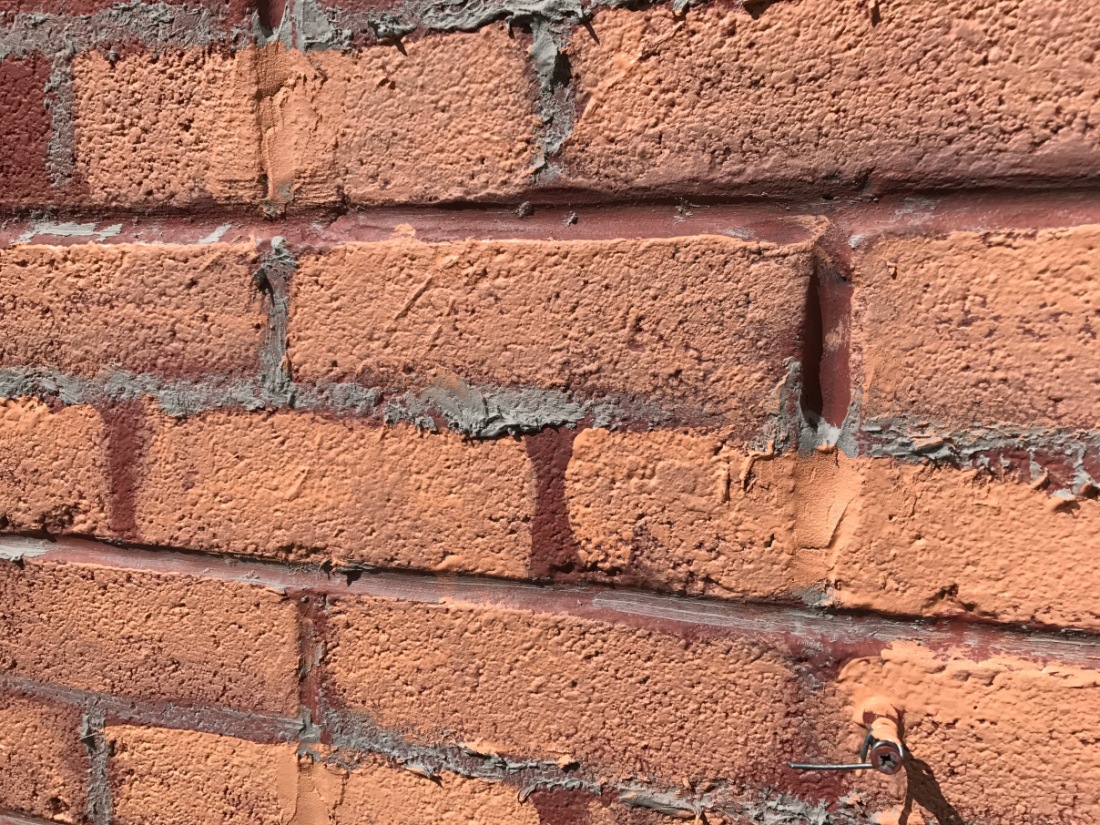
Experiment with lighter and darker ‘mortar’ colours, nothing should be to uniform.
I continued to add, adjust and readjust. Darker underneath the brick with highlight on top and side in the direction of the light help make it look at natural, but go easy. Look at real brick to get your cues.

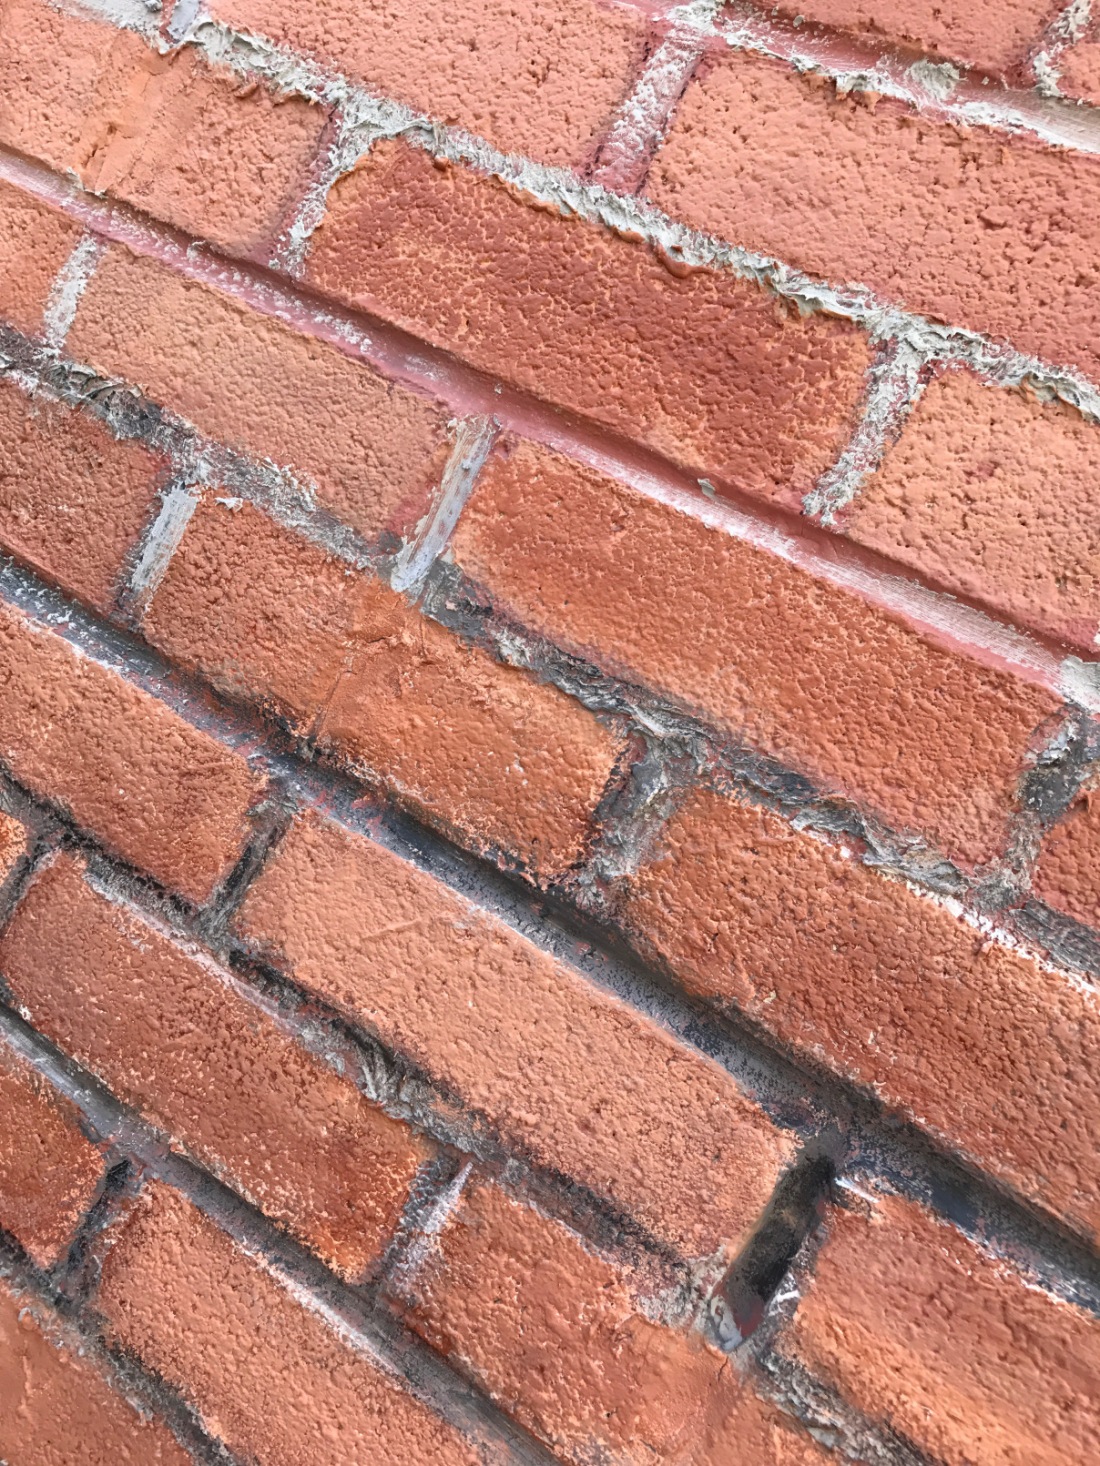
You can see some of the close up detail here as I begin to build it up. I used the natural texture of the breeze block to try and mimic the texture of brick.
Mix up the colours – lighter bricks next to darker etc. The idea is you want the eye to see brick shapes. You can’t do it all with mortar effects because you are dealing with to many flat surfaces so use whatever you can to tell the brain it’s seeing bricks.
Step back and reassess often. Don’t let yourself get too tired. If you start making mistakes put your brushes away for the day. This section took me about 4 hours, but when you start it’ll take longer until you get the knack.

 I’m happy with this for today. I will definitely tweak some more to get it to the standard of my large curved wall (below) but I think this is enough of a tutorial to enable you to get going.
If I’ve missed anything or you want any more info, please let me know.

